Jira is a popular project management tool used across many industries. It enables teams to collaborate efficiently on various tasks and projects. With issues (also referred to as tickets), teams are able to track individual tasks across projects and workspaces. However, it is often possible that someone deletes a Jira ticket by mistake. Sometimes, even a misconfigured app on your Atlassian workspace can result in a deleted Jira ticket. For example, if an app has permission to read and write data to your Atlassian workspace, it can technically overwrite and delete all your Jira data.
You may also suffer data loss due to incidents on Atlassian’s side, such as security breaches, internal operational errors, or any other error, over which you have no control. Atlassian’s shared responsibility model for data security specifies that the provider’s (ie Atlassian’s) responsibility is limited to securing the app from external issues and threats. Meanwhile, the customer must ensure the security of their endpoints, users, configuration, workload, and data. The Atlassian Customer Agreement clearly states that “Atlassian does not warrant that Customer’s use of the Products will be uninterrupted or error-free.”
You may recall the Atlassian outage of 2022, where accidental deletion led to a fourteen-day service disruption for some customers, resulting in data loss of up to five minutes for certain enterprises. For businesses operating at scale, such losses could translate into significant setbacks, particularly during critical operational phases.
In this tutorial, you’ll learn the strategies for safeguarding against inadvertent Jira ticket deletion and the ways to recover deleted tickets through backups.
Handling Deleted Tickets in Jira
When you delete a Jira ticket, it’s permanently removed from the system. The delete prompt also warns you about this:
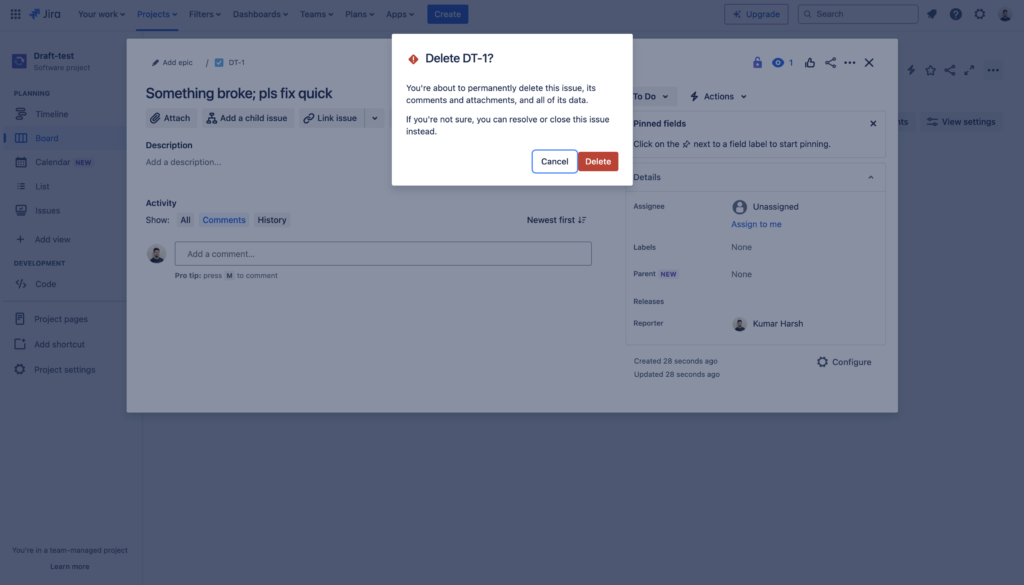
Note: This is why you should never delete an issue until it is absolutely necessary to do so.
However, you might delete an issue and then later realize that you still need it—meaning you need a way to recover it. If you plan for such situations carefully, you can ensure that you and your team still have access to your issues even after deletion.
Regular Backups of Your Jira Data
As you’ve already seen, Jira does not offer any support for recovering deleted issues. If deleted, even accidentally or due to any of the mentioned scenarios (eg a security incident, an outage, or an Atlassian issue), the issues are permanently deleted. There’s only one way to avoid data loss in these scenarios—backups.
You can use an automated backup system like Rewind to restore deleted data in your Jira instance. Rewind integrates into your Atlassian workspace as an Atlassian app and allows you to create backups manually or set pre-determined schedules for automated backups.
Once you’ve configured Rewind backups, you won’t need to worry about accidentally losing data from any of your Atlassian instances. Using Rewind, you can retrieve the most recent backup of your Jira issues whenever necessary, ensuring quick access to your previous data.
Rewind backups also include metadata associated with your issues, such as assignees, parent issues, reporters, and comments. Therefore, you can recover this data quite easily—you don’t need to worry about handling a JSON soup of metadata that needs to be recreated in Jira manually. Furthermore, Rewind relies on Atlassian SSO to strengthen the security of your data backups.
Rewind offers backups for Jira and other similar services, such as Jira Service Management, Confluence, and Bitbucket. Regardless of whether an issue was lost due to a manual error or an incident on Atlassian’s end, you can always restore all your data using Rewind.
How to Prevent Users from Accidentally Deleting Tickets in Jira
Because automatically recovering deleted issues from Jira is impossible, you must prioritize preventing accidental deletions. In the next few sections, you will learn a few ways in which you can prevent or, at the very least, reduce accidental deletions.
Limiting Permissions
One of the most important ways to prevent accidental deletions is to set the right permissions in your workspace, which will ensure that unauthorized people may not accidentally delete tickets. Jira allows you to assign roles to your team members who use the Jira app with you. You can choose from three default roles—Viewer, Member, and Administrator. Out of these three, only a user with the Administrator role can delete issues, so make sure to provide this role to only those members who really need it.
Also, keep in mind that administrators can still end up accidentally deleting issues. Hence, it’s best to follow all other practices discussed in this guide while restricting user permissions.
Archiving
One of the simplest ways to avoid deleting something is to archive it in a hidden folder until you need it. If you archive an issue, you move it to a special hidden state, and it cannot be accessed from the main Jira workspace.
However, most Jira versions do not support archiving issues out of the box. You can archive issues only in the Data Center version of Jira. This means that those using Jira Cloud or Jira Enterprise (but not Jira Data Center) cannot use this functionality.
If you are using the Cloud or Enterprise versions, you can manually set up an archived state for your issues. You can designate an issue status for archiving and moving issues to this status when you want to archive them.
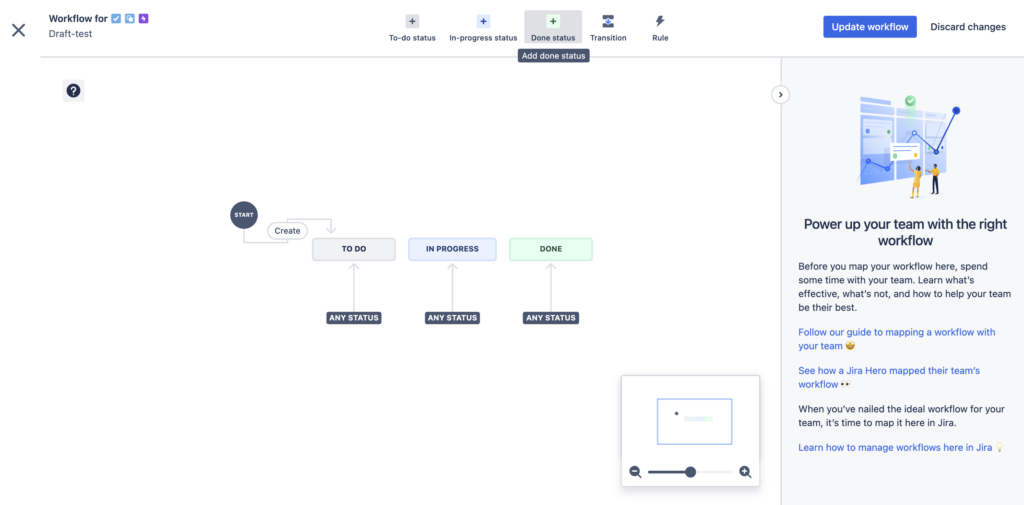
To do this, you need to edit the workflow used by your project. In the workflow editor screen, click the green Done status button at the top:
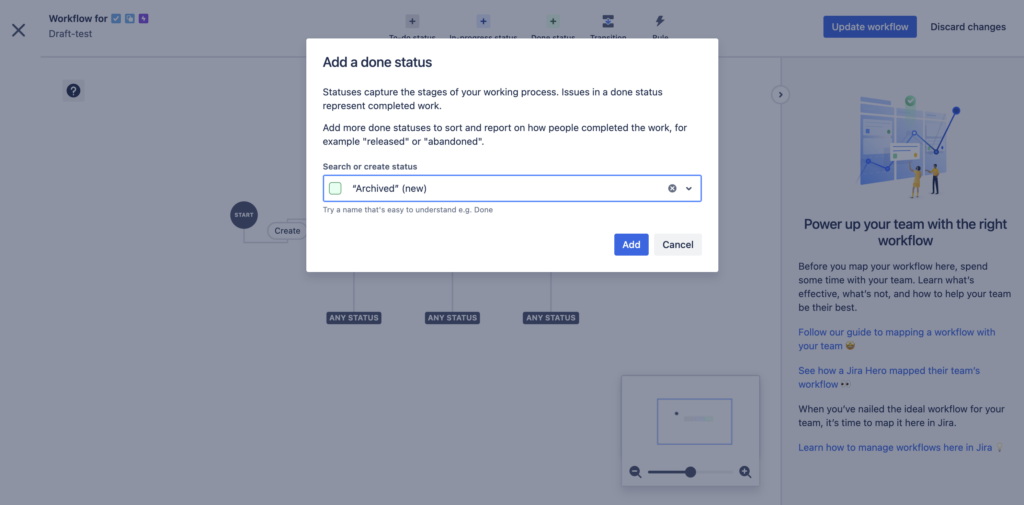
Provide a name for your new status in the dialog. In this case, you can name it something like “Archived”:
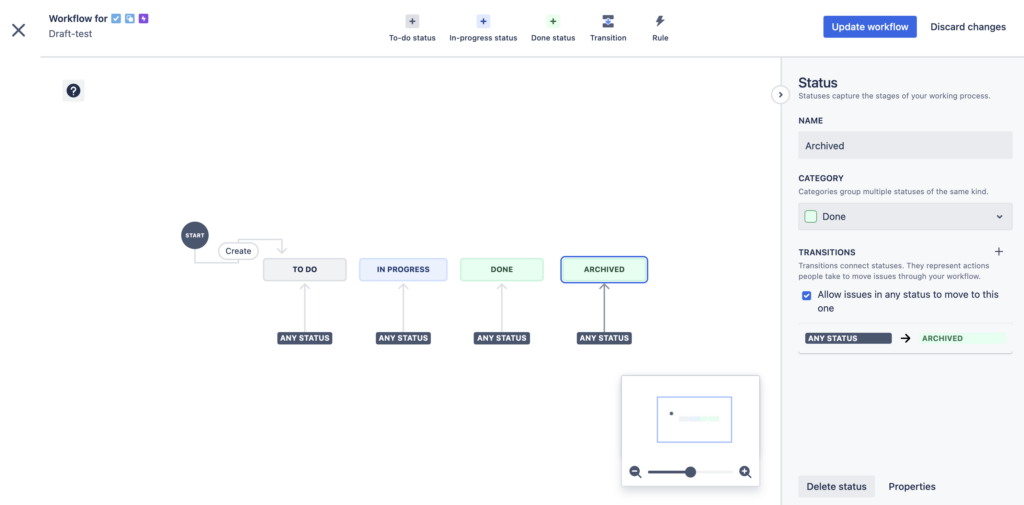
Click the Add button. This adds the new status to the workflow graph as well:
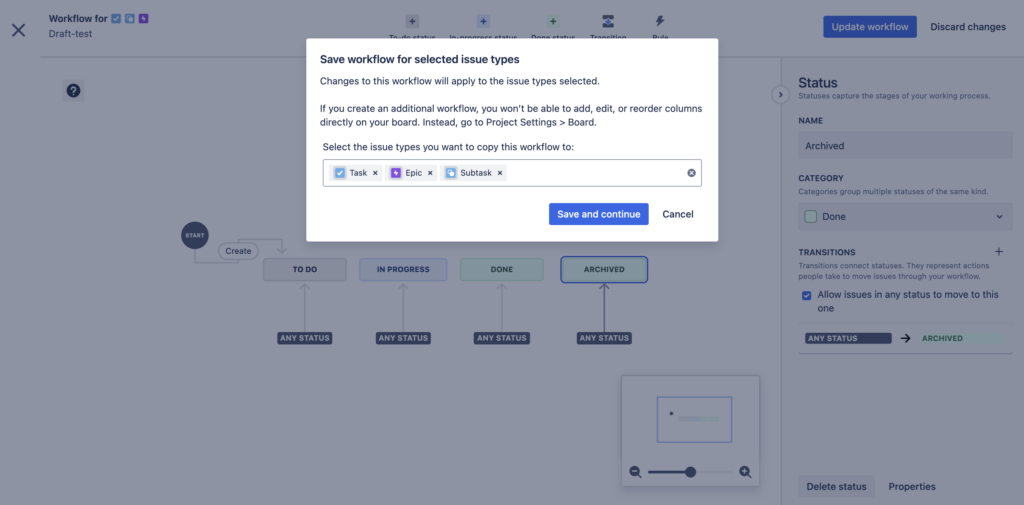
Click the Update workflow button at the top right. In the dialog, click the Save and continue button:
Jira will ask you to review columns and statuses on the board. You can move them around to position the new Archived status toward the end of the board to avoid running into it frequently when working on the board:
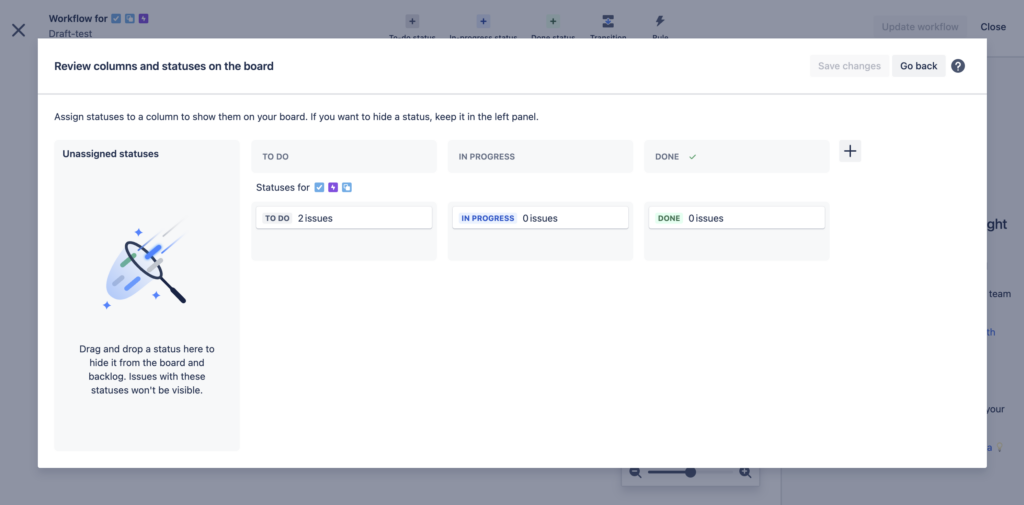
Once done, click Save changes or Go back. This completes the setup of the Archived status. You can now add issues to this status by going to the issue page and setting their status as ARCHIVED:
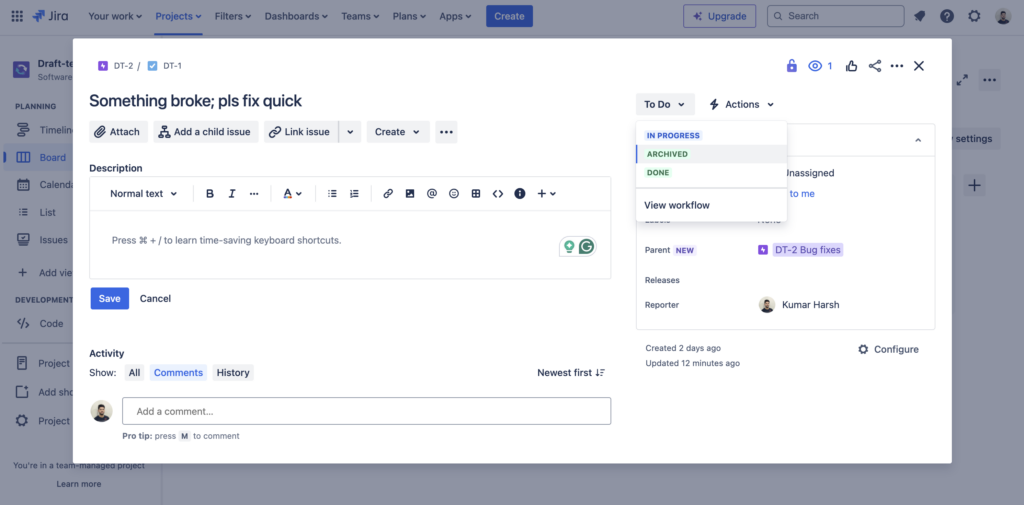
If you set any issue to archived, you’ll find the issue in the Archived list. Since this is a Done status, assignees (and other people working on this issue) are informed that this has been marked as closed, leaving no loose ends.
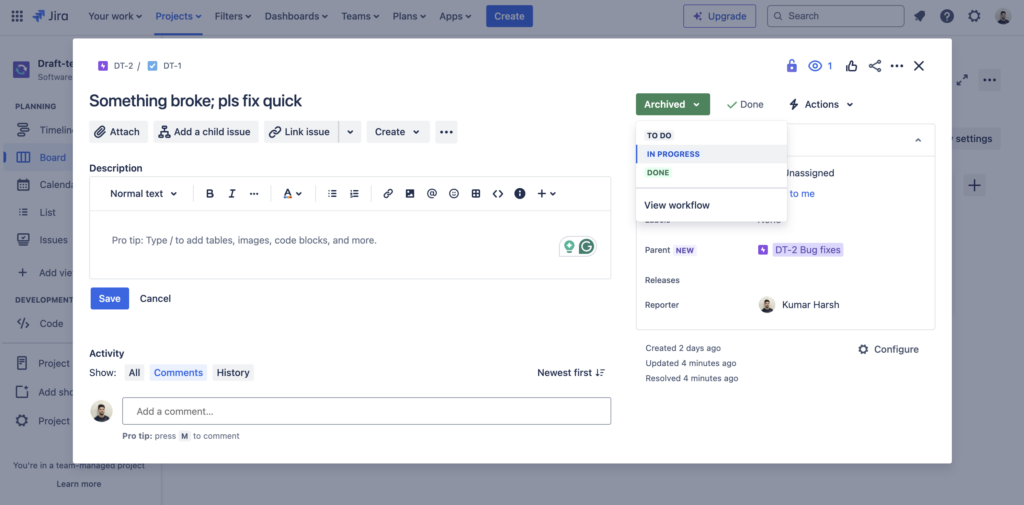
You can always go back to the issue details page and move the issue back to another status if needed:
While this method works great for small teams with a limited number of projects, it might not be very useful for teams working with many projects. Each Archived status is local to a project, so you need to either manually add it to each project (whether preexisting or newly created) or update the default workflow scheme to add it. Either way, it’s a lot of work, and a misconfiguration when editing a workflow can affect your existing issues statuses as well. Additionally, this method does not offer any protection from errors on Atlassian’s end (or through an installed app) that might result in data loss.
Backups
As mentioned before, it’s always a great idea to set up backups for your Atlassian workspaces to prevent data loss from accidental deletions. Since Atlassian takes no responsibility for the data you create and store inside their applications, it’s up to you to secure your own data.
Rewind’s convenient automated backups can provide easy ways to recover your Jira issues when needed. If you are using Rewind, you can even skip manually setting up an archived state as Rewind can maintain snapshots of your issues data over time.
User Education
Training your team members about how to handle Jira tickets and the consequences of deletion is one of the most effective ways of reducing accidental deletions. If it was another entity, such as a project, you could have recovered it from the trash within sixty days of deleting it. However, if you delete an issue, the action is irreversible.
It can also be very beneficial to clearly explain how archiving works. If you set up a custom status in your Jira workflow to mark issues as archived, it might not be self-explanatory for everybody. Hence, a clear notice and documentation around this would be extremely helpful.
Finally, it’s important to notify and educate your users about the backup system you’ve set up. Proper training and education ensure they understand how to recover data in the event of a loss. It also gives them peace of mind, knowing there’s a solution to retrieve accidentally deleted objects. This is why you must always back up your Jira data.
Conclusion
As you’ve seen, it’s not possible to recover deleted issues in Jira. Additionally, by default, Jira does not allow you to archive issues in most of its offerings. However, there are a few other ways to archive your issues and preserve your Jira issues data. One method is to create a designated status for archived issues in your Jira workflow. While it works for controlled operations, it still does not protect against situations like data loss due to operational errors on Atlassian’s end. In such cases, you can rely only on a third-party solution like Rewind to regularly back up your Atlassian data and create on-demand restorations.
Rewind offers backup and restore services for a number of Atlassian apps, including Jira, Confluence, Bitbucket, and Trello. Once you set up Rewind’s automated backups, you can rest assured that your Jira data is safe from mishaps like accidental deletions, operational errors, and misconfigured apps.