Every software project needs a way to track and organize work that needs done. Tools for this range from simple to-do lists in one-man hobby projects to professional issue trackers in giant codebases with hundreds of maintainers.
Large open-source projects use issue trackers in different ways: some choose to work with dedicated issue-tracking tools like Jira (Open edX, Swift, OpenMRS), YouTrack (Kotlin) or Trac (Django), but most stick with GitHub’s own offering, GitHub Issues.
What Is GitHub Issues?
GitHub Issues is a lightweight issue-tracking system that is available in all GitHub repositories. When you create a GitHub repo, you get GitHub Issues out of the box, and more often than not, you keep using it as your project evolves.
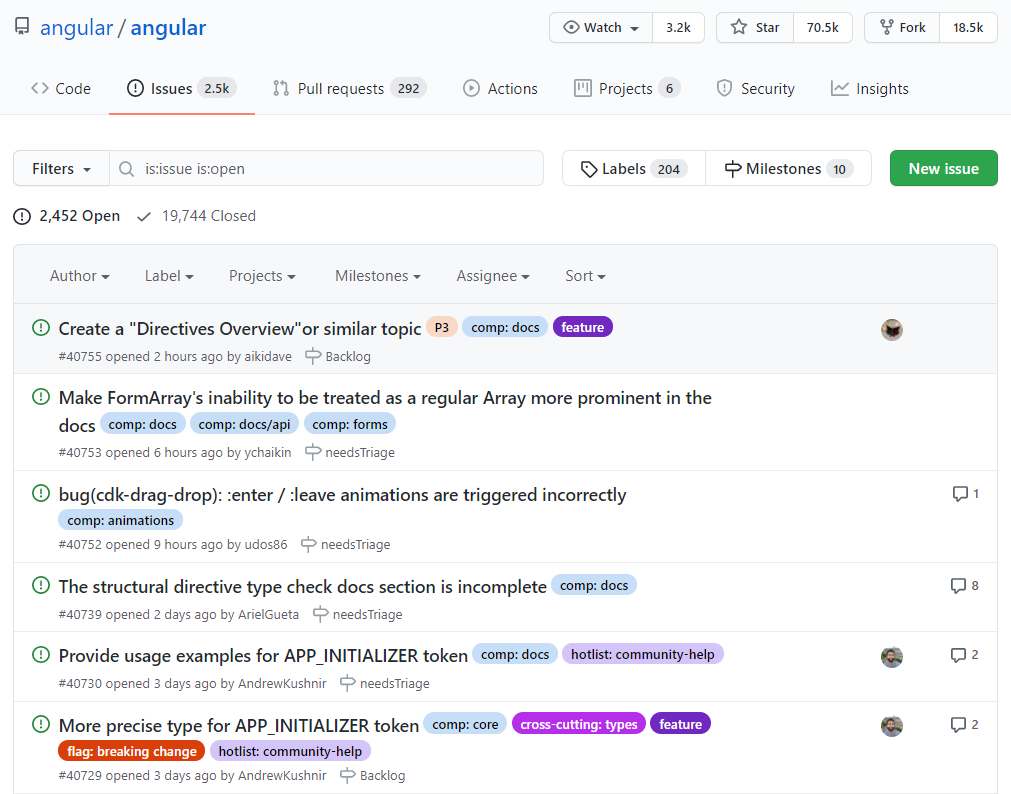
In most cases, GitHub Issues is used for reporting bugs and requesting features. Sometimes it hosts discussions, helps process support requests, or even submit documentation feedback.
If you want to use GitHub Issues with your repository for a long time and stay productive, consider following basic issue tracker maintenance practices that are described below.
Best Practice 1: If You’re Just Starting, Go With the Defaults
If your repository is brand-new, you don’t have a lot of issues reported, and you want to enable all kinds and forms of feedback to flow in, just keep the default settings for your GitHub Issues.
You will be able to interact with users freely without limiting what they can report and have insightful discussions that may not necessarily be actionable. This could be a good idea in the early stages of your project when you’re still getting a feel for your users and the problems they face.
If you decide to go down this path, be prepared for a lot of back-and-forth with your reporters, and don’t forget to go through stale issues and close them once in a while.
As your user base grows, so does issue traffic in your repository, and you’ll probably start to wonder if you need to make your reporting workflow more intentionally structured. If you feel you’ve reached a new level of maturity, check out the following practices.
Best Practice 2: Encourage Search to Avoid Duplication
Encourage reporters to search for existing issues before submitting new issues. This saves time for everyone. If a similar issue already exists:
- The reporter can get an update on the status of this issue, learn about workarounds that may have been described by other affected users or the project team, and avoid spending time describing the problem. Simply upvoting a previously reported issue will do just fine.
- Project maintainers can save time triaging issues and have all relevant user feedback that can inform their work on a particular problem in one place.
Some issue trackers automatically look for possible duplicates as you type the description of a new issue. Unfortunately, GitHub does not do this. You can’t really force users to search before reporting, and you’ll probably still need to triage and look for duplicates, but just asking goes a long way.
So what’s the best way to ask users to search before submitting? On GitHub, the answer is contributing guidelines.
Simply create a document called CONTRIBUTING.md in the root of your repository, use it to describe your preferred issue reporting workflow, and make sure to emphasize the importance of searching for existing issues before submitting anything new. Feel free to draw inspiration from guidelines in existing repositories.
When your repository has contributing guidelines in place, every time a new user tries to create their first issue, they see a prominent overlay with a link to contributor guidelines:
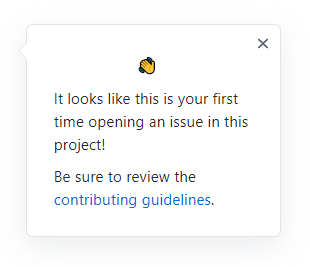
For more on contributing guidelines, see “Setting guidelines for repository contributors”.
Best Practice 3: Add Structure to Issue Reporting and Encourage Reporters to Be Specific
There’s one way to submit a feature request. There’s a different way to submit a bug. Discussions and support requests may or may not be welcome in your issue tracker.
As your repository receives more issue reports, you need to define exactly what kind of issues you’re ready to accept and what kind of information you want them to contain. To help you with this, GitHub Issues provides issue templates.

To start off, use GitHub’s template builder to set up standard templates for bug and feature reporting:
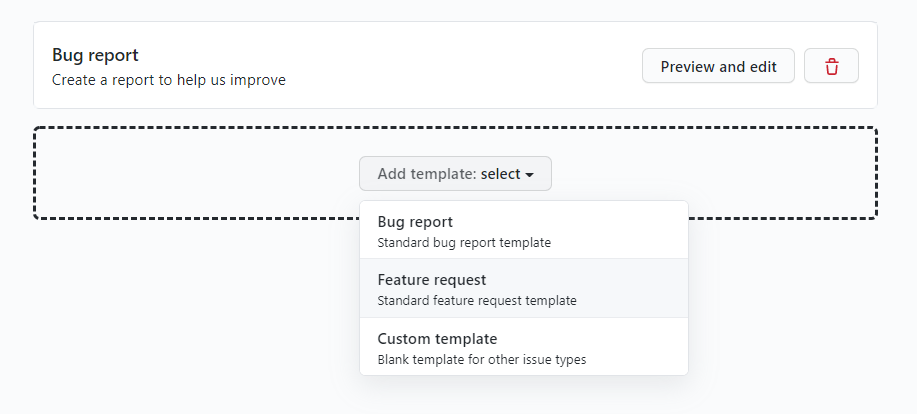
After configuring the basic templates, try clicking New Issue. Instead of a regular issue form, you’ll land at the template chooser—a view that requires you to choose a specific type of issue:

When you click Get started to create a bug report, you’ll see the issue form pre-populated with GitHub’s standard bug report template that you’ve just configured:
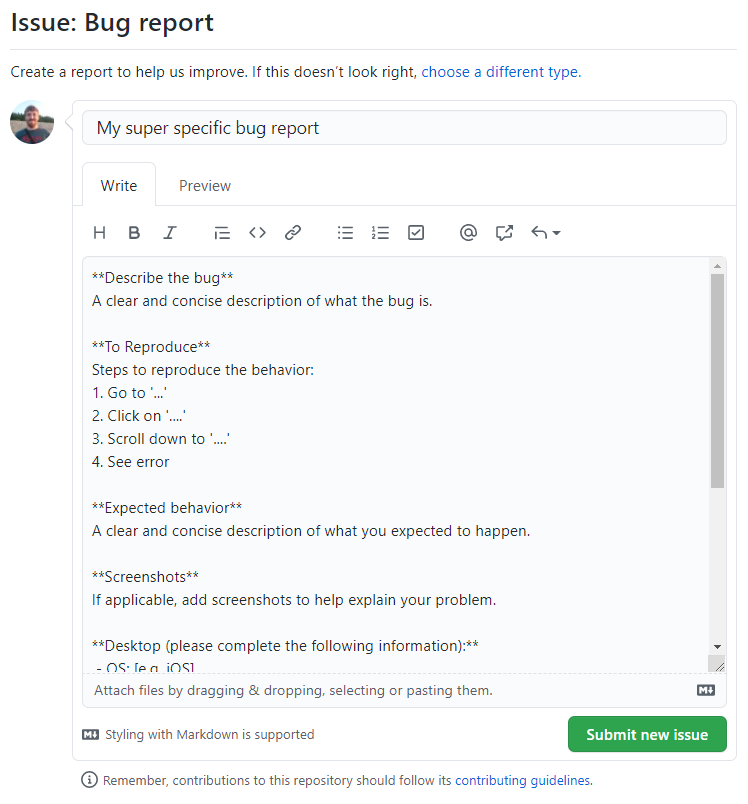
You can now customize GitHub’s default issue templates and add more templates to match your team’s preferences. To do this, use the template builder described above or edit template files manually. Issue template files are YAML files that are stored in your repository in the .github/ISSUE_TEMPLATE folder:
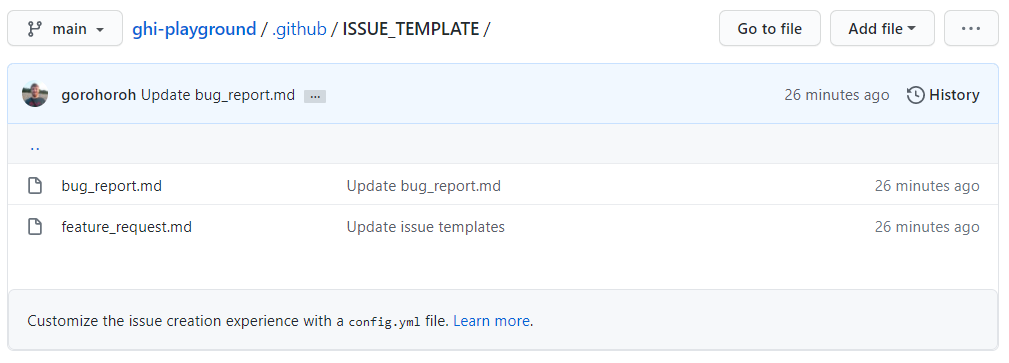
For inspiration, check out issue templates used in popular repositories, such as tensorflow, angular, or freeCodeCamp.
You can go even further and customize the template chooser view by adding a config.yml file to the .github/ISSUE_TEMPLATE folder. This lets you do two things:
- Require reporters to use the suggested issue templates, as opposed to just recommending using them.
- Direct reporters to external sites for activities that you don’t allow on your issue tracker, such as filing support requests, getting community support, or even submitting bug reports to your organization’s other repositories.
Feel free to explore how popular repositories customize their template choosers:
Best Practice 4: Route Vulnerability Reports Elsewhere
Vulnerabilities in code are a fact of life. You normally want to detect and fix them internally, but sometimes vulnerability reports come from external users.
When this happens, you usually don’t want them to be revealed publicly as this would give you no time to investigate and take action. Instead, the common practice is to provide a separate reporting path for responsible disclosure, where the vulnerability is reported privately to the vendor and is not disclosed publicly until the vendor has prepared a patch.
For example, here’s how the React repository provides a separate workflow for reporting vulnerabilities:
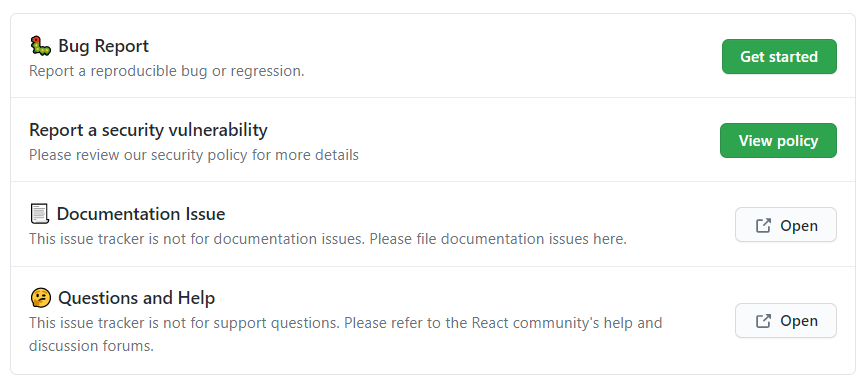
Best Practice 5: Use (But Don’t Overuse) Labels
Labels are a great way to categorize issues and slice your team’s work into manageable pieces. Since you can apply multiple labels to any given issue, labels are a highly flexible tool that can solve various problems. Here are some of them:
- Break the project down by areas of responsibility. Depending on the architecture of your application, you may want to use labels for individual components or subsystems.
- Mark non-triaged issues. If your team wants to triage every new issue, then you can use a special label (for example, to triage) and apply it to every new issue via issue templates. A person responsible for triaging issues would then need to search for all issues that have this label and remove the label as they process the issues. When a search for issues labeled to triage returns nothing, it means that all issues have been properly triaged.
- Isolate issues that await additional information from the reporter. If an issue lacks details necessary to make it actionable, you can request the details from the reporter and set a special label, such as needs more info. If the reporter fails to provide details in a specific time frame, you’ll be able to close the request as incomplete. (By the way, you could automate this workflow using a GitHub Action like this).
- Create a pool of issues that are open for external contributions. Labels like good first issue and help wanted are normally used for this purpose. For details, see “Encouraging helpful contributions to your project with labels”.
By default, GitHub will create a default set of issues when you set up your repository:
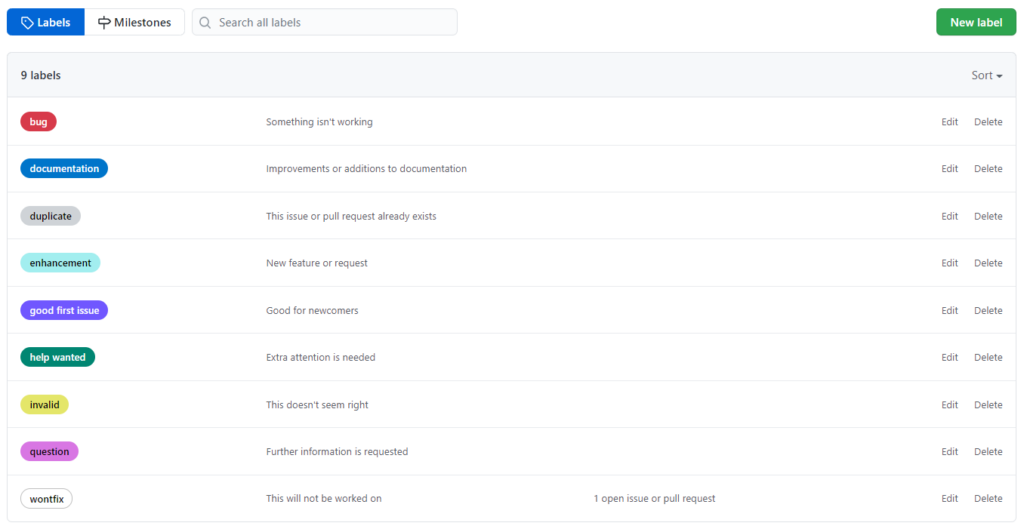
You can leave this default set as is or make changes. For example, you may want to:
- Use prefixes to reflect the kind of property that a label expresses. Instead of bug and enhancement, you may want to use type: bug and type: enhancement. Instead of invalid and duplicate, use state: invalid and state: duplicate. This helps users better understand what options are available for each kind of property when you choose a label to set. This label naming scheme is used in one of the largest GitHub repositories, freeCodeCamp.
- Use consistent colors across all labels of a particular kind. For example, you could make all type: n labels light green (you’ll want to notice these labels when you browse issues) and all state: n labels light gray (you don’t want to notice these when browsing).
As a general rule, don’t use too many labels. Browsing a list of issues with each issue decorated with five to ten colored labels is hard on your eyes and bad for your focus. Unless it’s Christmas, don’t turn your issues into a Christmas tree.
Best Practice 6: Mention the Appropriate People
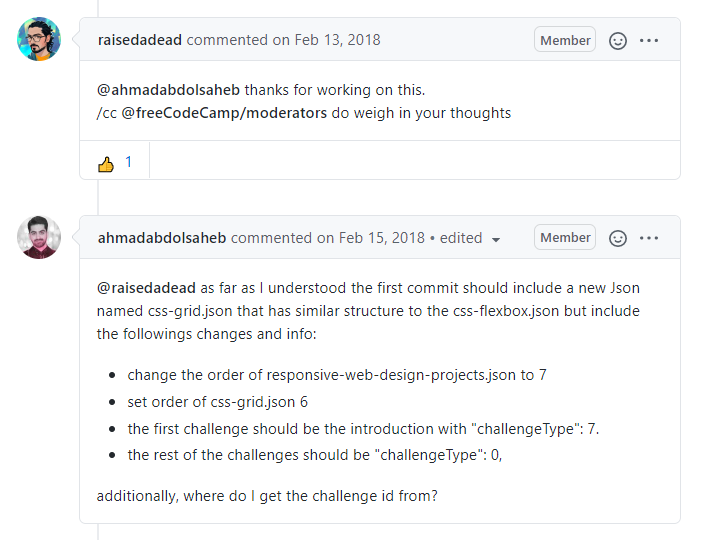
Mention other people if you want to use their expertise, have them provide an estimate, or just be aware of an issue. GitHub lets you mention users and entire teams with the @username syntax, much like Twitter and Facebook do. When you add mentions, consider the following:
- Since every mention results in an email notification to the person you’re mentioning, try to mention sparingly.
- When mentioning a user who was previously not involved in an issue, try to make it clear if there’s an action you want them to take or if you’re just making them aware of what’s going on.
Best Practice 7: Choose a Workflow to Assign Issues to Developers
Assigning issues to specific developers is a great practice. However, how exactly developers should be assigned depends on visibility and usage of your repository:
- If your repository is private and you don’t expect people from other parts of your company to report issues, you can agree to set assignees immediately when new issues are created. This approach works as long as every possible reporter knows which developers should handle which issues.
- If your repository is public and you receive issue submissions from external users, you can’t expect them to know which developers should be assigned to their issues. In this case, it’s better to leave new issues unassigned and schedule regular review of such issues by someone on your team.
Best Practice 8: Don’t Forget to Close Issues
One notable issue-tracking anti-pattern is keeping an issue open when the reported problem has in fact been solved. When this happens, users stay unaware of changes they requested. And as for developers, every extra open issue makes it harder for them to decide what they need to do next.
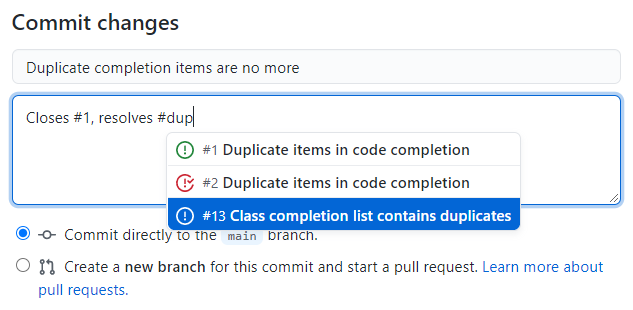
Fortunately, there’s a special syntax, Closes #issue_number, to auto-close issues from pull request descriptions and commit messages. When you use this syntax, once the commit is pushed (or PR is merged) into the main branch, GitHub automatically closes the referenced issue(s). For example, if your commit resolves issues 1 and 13, you can type Closes #1, resolves #13 (here, closes and resolves are interchangeable). Note that you don’t even need to remember issue numbers: after typing the hash character, you can use text search:
For more on closing issues with references from PRs and commits, see “Linking a pull request to an issue”.
Best Practice 9: Backing up GitHub Issues
If GitHub Issues are an important part of your development workflow, you should consider backing them up periodically. While there are some simple, free scripts that will help you backup your Git repositories, most only back up the code and not Issues or other metadata. You also likely have to run these scripts manually.
The most robust option is BackHub (now part of Rewind), the only GitHub recommended BaaS (backup-as-a-service) solution that automatically makes nightly backups of your code, Issues, metadata, and projects in GitHub. Whether you need these backups for regulatory compliance or simply peace of mind, the small investment in BackHub is typically worth it for production code.
Summary
GitHub Issues is a lightweight but capable issue tracker. Although it lacks the power of dedicated tools such as Jira or YouTrack, it still enables you to create a moderately scalable framework for issue reporting and maintenance.
Remember that a poorly maintained issue tracker can quickly turn into a heap of patchy, incomplete reports that will keep developers wondering what to do next and disrupt communication with users. In contrast, a well-maintained issue tracker minimizes uncertainty and provides the development team with clear user feedback that is easy to prioritize and act upon.

 Jura Gorohovsky">


