Rewind’s Advanced Restore can be used to restore your entire QuickBooks Online file back to a specific date and time. Before using the advanced restore, ensure that you have exported your reports to your computer.
The process will attempt to delete all the items created since the selected restore point, recreate all the items deleted since the selected restore point, and update all the items modified in this date range.
In this guide, learn how to
- Restore QuickBooks Online data using Rewind’s Advanced Restore

Using Rewind’s Advanced Restore to Rollback Files
Up until this point, you should have run the reports for the date and time that you are rolling back to. You should have also run the reports until today. You have opened the books and unmatched transactions leading back to the restore point.
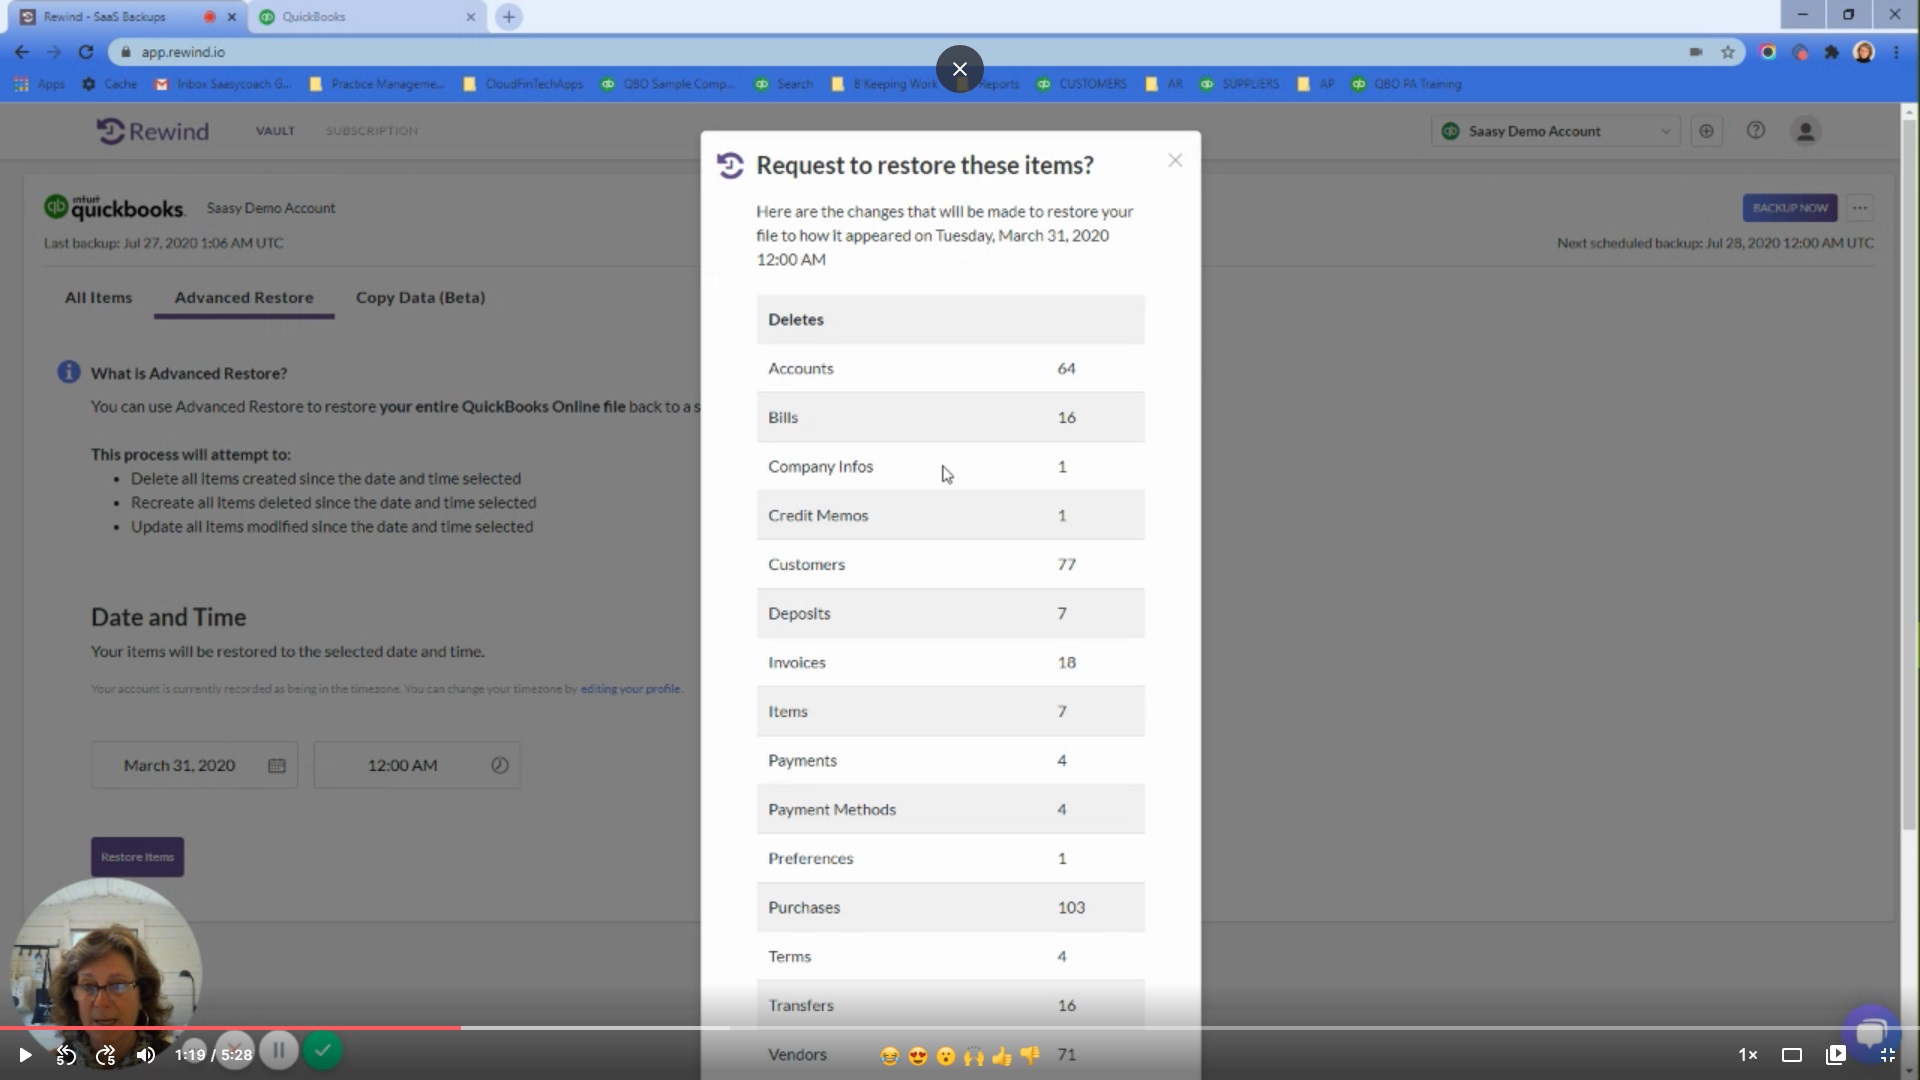
Now, go into Rewind and ensure you are viewing the correct file. Select the date you want to restore the file to. You will receive an email when the file is restored. Ensure that this is something that you want to do.

You will receive a list of the transactions that will be impacted. Insert your email address. Rewind will email you a success report. It will tell you when the restore was done, what was successful, and if there were any problems with the advanced restore.
Restore the file. Click “yes, restore.” When you are in the file, verify the data. First, close the books again. Click the gear icon, go into “Accounts and Settings,” go into “Advanced,” and close off the books as of the restore day. Use the M key to scroll through the months. Add a password and save.
Reviewing and Comparing the Restored Files
Verify the data by reviewing the success/failure items that came in the email from Rewind. Compare the “profit and loss” to the original file. Compare the “accounts receivable,” the “accounts payable,” and the “balance sheet” to the email. You can also run through the “trial balance” or whatever you use to verify the accounts as well.
Go into the “Chart of Accounts” and ensure it looks exactly the same way it did before you started the restore process. Correct any mismatched information. Go into “Banking” and look to see what has been introduced into the file. Review the “Bank Feed” and re-automate the rules. When you return to “Banking,” the mismatched information should be corrected.
Advanced restore can be used for a variety of reasons, such as app integrations and human errors. Beforehand, however, make sure that you double check and run reports, run your chart of accounts, and whatever lists you need to ensure the files are all the same.
As always, QuickBooks Online apps like Rewind can solve for many scenarios, and more importantly for peace of mind.
 Kellie Parks">


