If you’re working on a collaborative code project, there’s a high chance that you, like millions of other devs around the world, are using GitHub to manage your activities.
GitHub is an incredibly powerful tool, but you may already know how vulnerable your GitHub data can be. A wide variety of errors can threaten your data every day, including:
- User errors: Your repository is vulnerable to users who make mistakes such as an accidental force push after a reset or rebase, which could lead to a loss of data.
- Platform issues: GitHub as a platform has its own occasional difficulties and errors. Your account might get blocked or disabled, and there’s always the possibility GitHub could even accidentally lose your data.
- Security breaches: Your project could be the target of a hack, and malicious users could delete or alter your data.
All of these problems point to one common security solution: you need to back up your repositories.
However, you may not want to spend the time, effort, and money needed to create your own backup management tool. Fortunately, Rewind can perform backups for you.
Rewind is a complete solution, providing automated backups for your GitHub repositories and the ability to restore lost repositories with all metadata intact.
You can test this solution safely without risking your preexisting code. This article will show you how to set up Rewind on your GitHub account, set up a test repository, and explore Rewind’s features by deleting and restoring your repo.
Setting up Rewind on your GitHub account
Here are the steps to download and set up Rewind, then use it to restore a test repository.
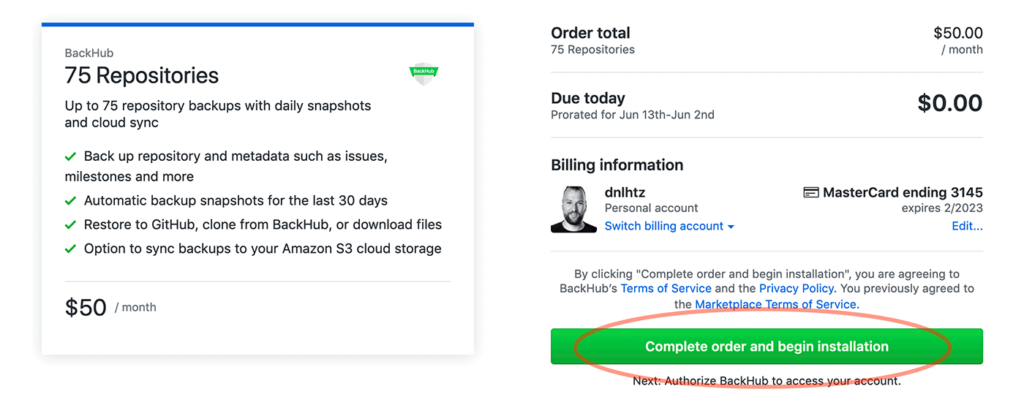
First, download Rewind’s app from GitHub’s Marketplace. For testing purposes, you can choose a free trial on whichever plan you prefer.
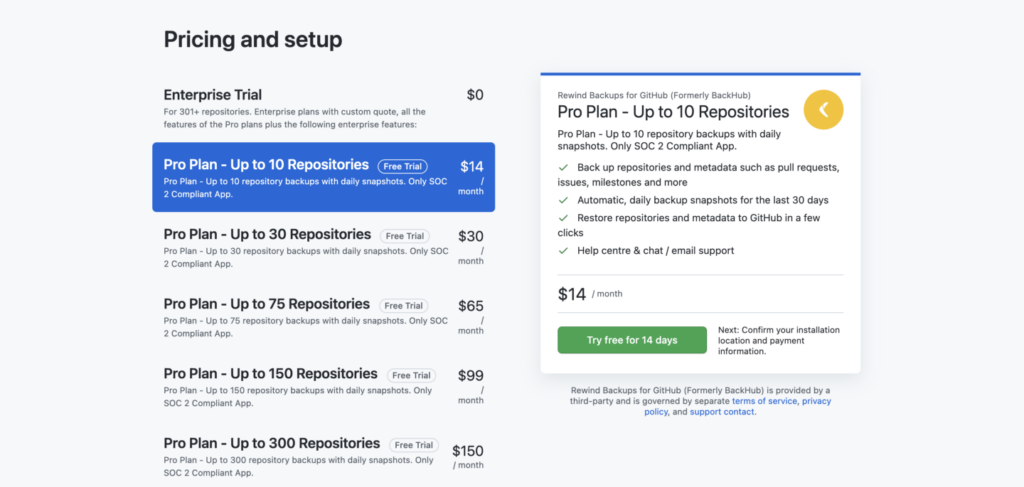
Then, enter your billing settings and select the GitHub account you want to install Rewind for.
Once everything is set up, click on Complete order and begin installation. Note that your credit card won’t be charged until your free trial is complete.
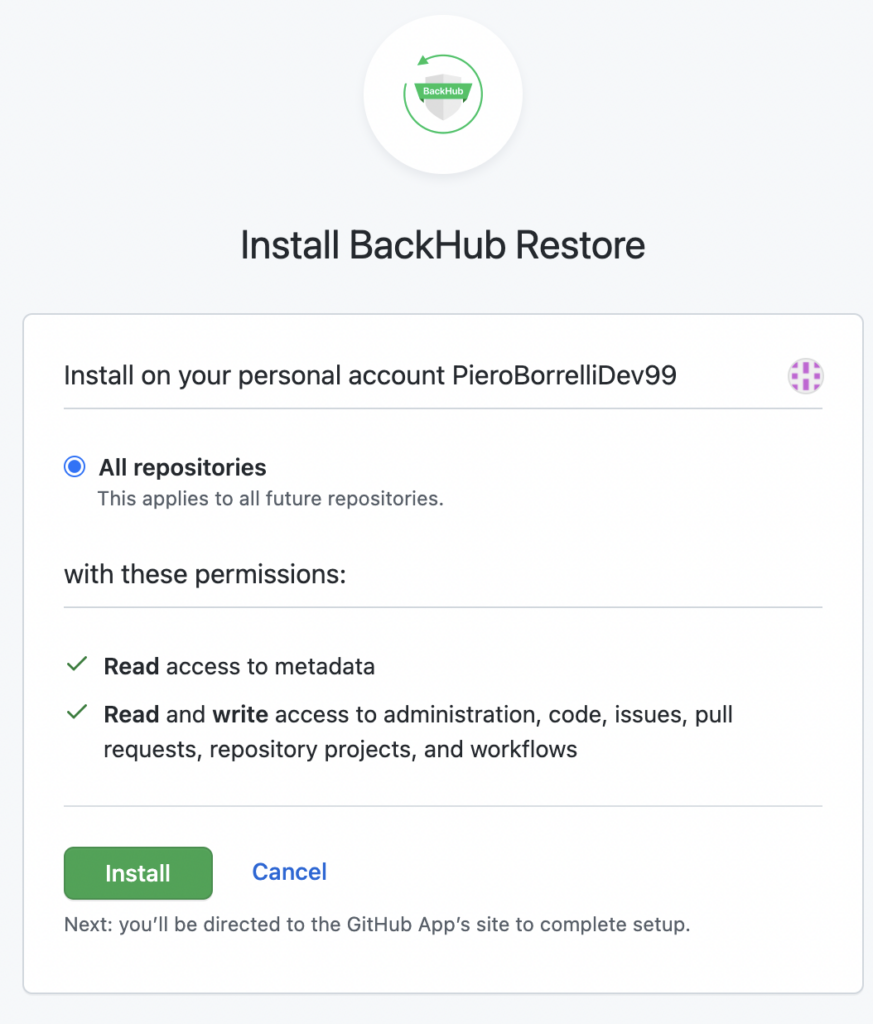
When the installation begins, you will be asked to grant Rewind access permission to your repositories so that it can back up your data.
To restore data, you will also need to download a separate app called BackHub Restore. Rewind needs this to access your GitHub account and create your restored repositories when needed, as restoring repositories requires different access permissions.
Once you’re done installing Rewind’s app for GitHub, you will be redirected to your personal board to manage all your repositories. This will be empty if you don’t have any repositories on your account.
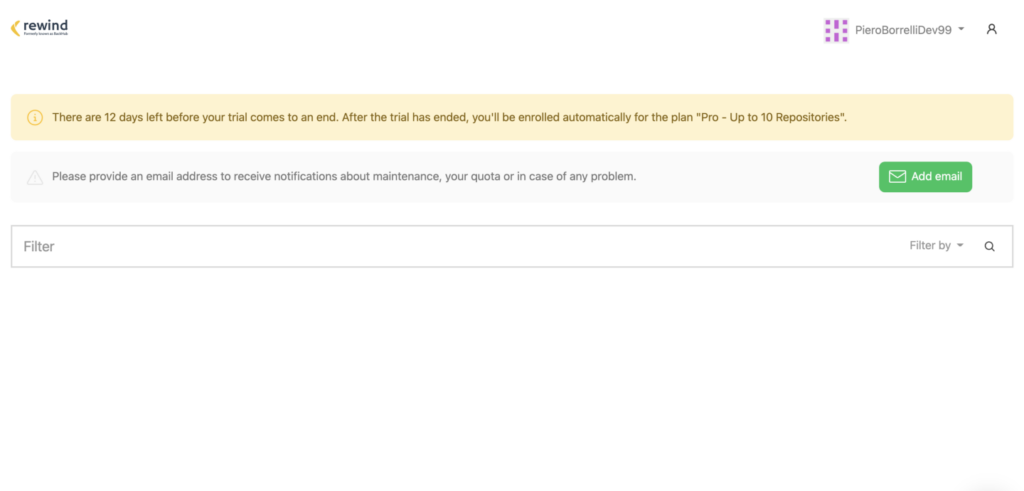
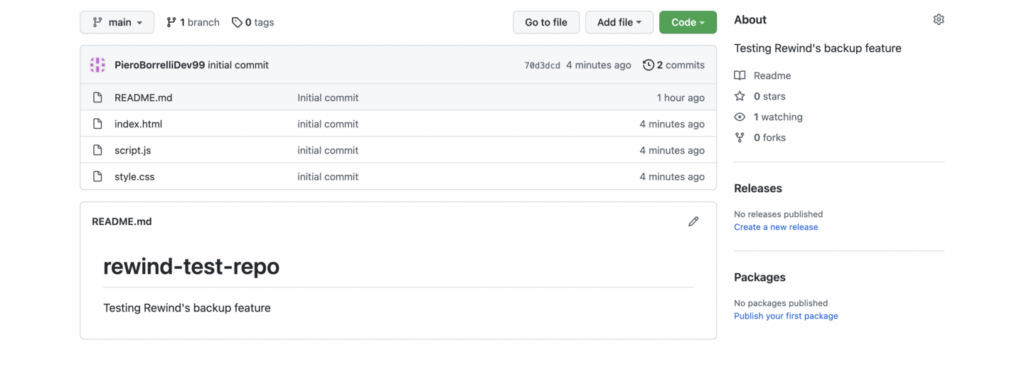
Now you can test Rewind’s backup functionality. To do so, simply add a test repo to your GitHub account. You can either create a brand-new repository and push your first commit, or you can fork an already existing project and push it on your account. This example uses an existing JavaScript project.
Every new repository you create will automatically be backed up. You can see the current state of your backup depending on the color surrounding your repo name: green stands for a successful backup, yellow for a pending one (some backups can take a long time), and red for an unsuccessful backup.
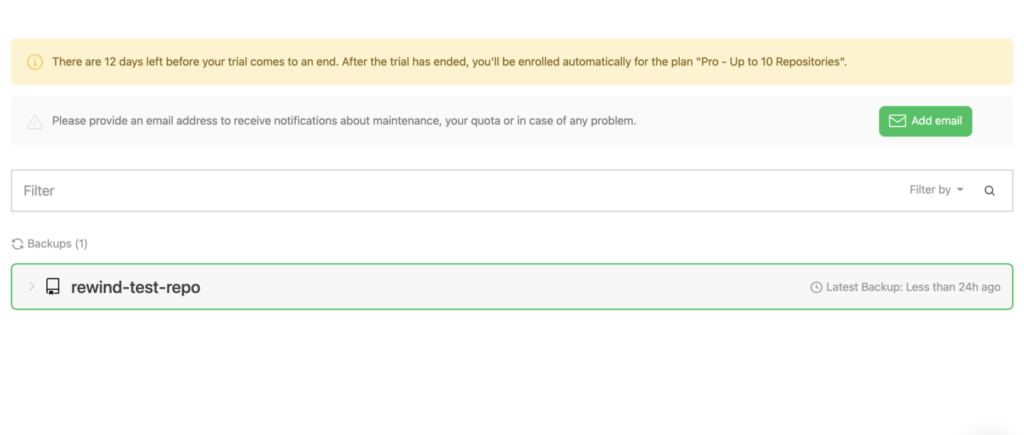
Backups are updated on a daily basis and contain your complete Git repository, including your branches and all GitHub metadata such as branches, issues, and milestones.
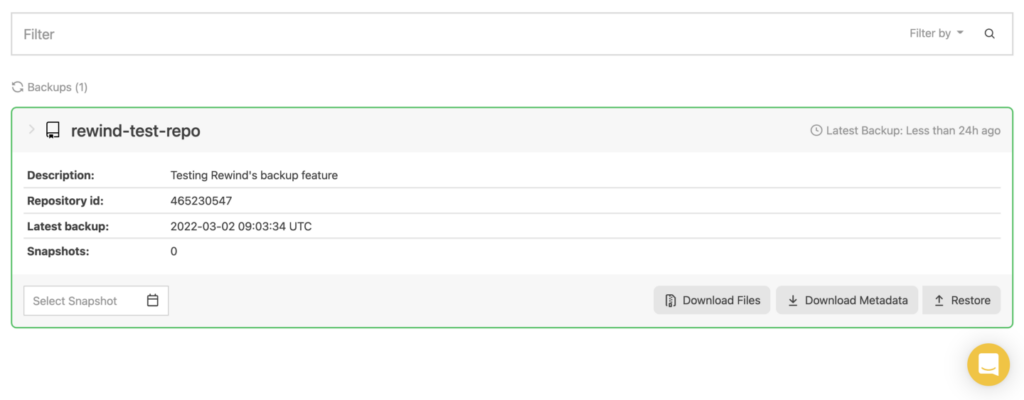
If you click on your backup, you will see a management menu. You have several options:
- Restore your backup to its latest update or back to a specific snapshot
- Download the metadata related to your repo
- Download all your project files
To verify Rewind’s backup capabilities, you can completely delete your test repository. While this is unlikely in a real-world situation, it’s a good way to test the data recovery properties of Rewind.
To start restoring your latest backup, click on the Restore button.
A modal will appear asking you if you want to restore your repo as private or public.
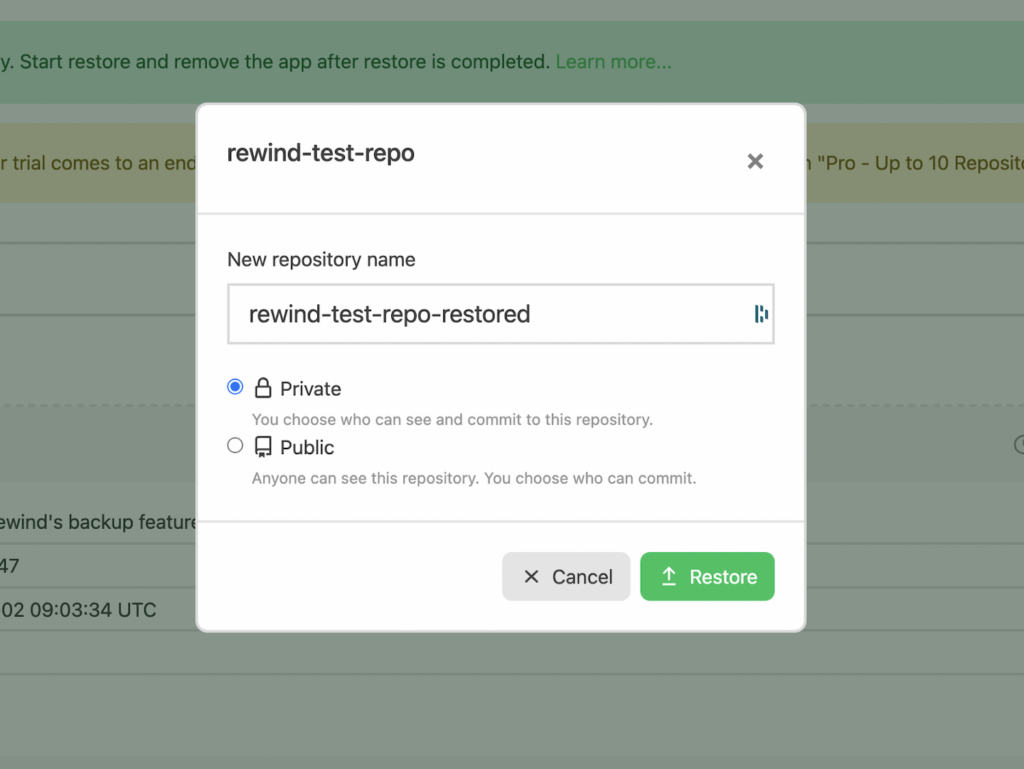
Once you’ve made your choice, your backup will be put in a queue. A dialog box will notify you when the restoration begins and ends.


Once the restore process is done, you can jump back to your GitHub account to verify that your backup restoration was successfully completed.
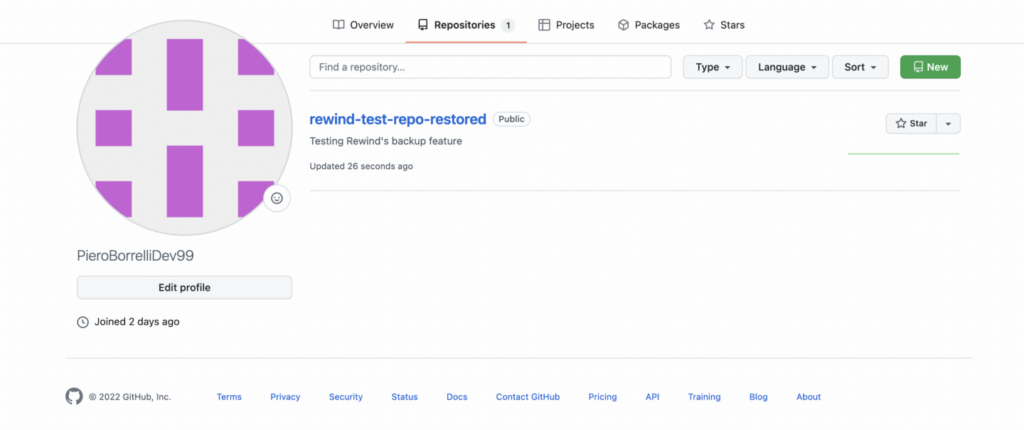
As you can see, your deleted repo has been restored back into your GitHub instance.
Conclusion
GitHub is an incredibly powerful tool but also a fragile one. If you want to protect your project from errors that could compromise your data, a backup tool is the best approach for you.
The gold standard of backups is third-party, independent backups stored off-site or off of the original platform. Rewind Backups provides automated daily backups of your GitHub repos and can restore data on a granular level in minutes. Cloud sync to S3 or Azure Blob storage enables teams to maintain their backups without investing developer time to set up, test, and maintain backups and backup storage.
 Sarah Bader">